
A Raspberry‑Bright Welcome to Dessert Happiness
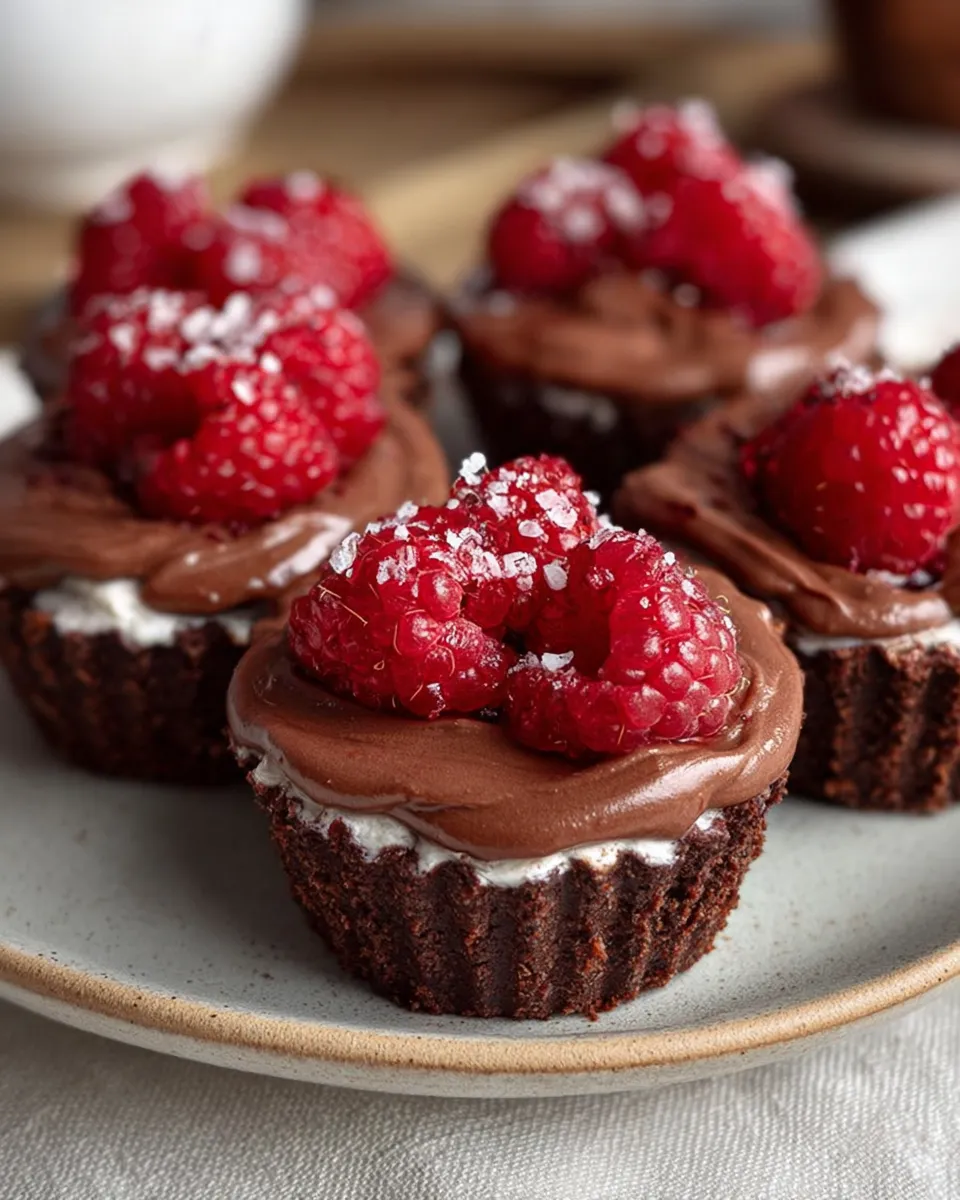
Last Friday I decided to bake something that would feel like a warm hug in a glass, but without turning the kitchen into a lab. Enter a no‑bake dream that layers crisp crust, tart raspberry, and a silken chocolate mousse in tiny cups. When you slice into one, you’ll see three distinct textures align: crumbly crust, glossy berry, and cloud‑soft chocolate. It sounds fancy, but it’s all hands‑on in the most friendly, no‑fuss way—perfect for sharing with a hungry friend or your future “Yes, please!” moment.
The magic lives in contrasts: tangy raspberry, deep chocolate, and a creamy, dreamy mousse that sets in the fridge rather than the oven. You can assemble these ahead, chill them until they look as pretty as a sparkly ring, and pull them out when the moment (or Pinterest mood) strikes. Ready for a crowd‑pleaser that travels well to potlucks, girlfriends’ nights, or a cozy date night at home? Let’s dive into the Marry Me No Bake Raspberry Chocolate Mousse Cups.
Ingredients
- 1 1/2 cups chocolate cookie crumbs
Tip: For a richer crust, crush actual chocolate cookies; gluten‑free option: use GF chocolate cookies; dairy‑free swap: use melted coconut oil instead of butter.
- 3 tablespoons unsalted butter, melted
Tip: Binds the crust for a crisp, sturdy base; if dairy‑free, substitute with melted coconut oil and a pinch of salt.
- 1 1/2 cups fresh raspberries, divided
Tip: Reserve about 1/2 cup for the sauce and garnish; choose berries that are bright, fragrant, and essentially plump.
- 2 tablespoons granulated sugar
Tip: Adjust to taste depending on the sweetness of the berries.
- 1 teaspoon freshly squeezed lemon juice
Tip: A touch of lemon heightens the raspberry brightness.
- 1 cup heavy cream (cold)
Tip: Chill the bowl and whisk for extra volume; dairy‑free option: use well‑chilled coconut cream and whip until fluffy.
- 4 oz dark chocolate (70% cacao), finely chopped
Tip: Choose high‑quality chocolate for a glossy, glossy mousse; dairy‑free chocolate works for vegan versions.
- 2 tablespoons powdered sugar
Tip: Lightly sweetens the mousse; skip or reduce if your chocolate is very sweet.
- 1 teaspoon vanilla extract
Tip: Adds depth; a pinch of espresso powder can elevate the chocolate flavor.
- 2 tablespoons cream cheese (optional, for extra stability)
Tip: Helps the mousse hold its shape; omit for a dairy‑free version if you’re using whipped coconut cream.
- Fresh raspberries and chocolate shavings for garnish
Tip: Add a mint leaf for a fresh pop and a pretty finish on Pinterest-ready cups.
Instructions
- Make the crust: In a small bowl, mix the chocolate cookie crumbs with the melted butter until evenly moistened. Press a compact layer into the bottoms of 12 mini cups or a muffin tin lined with paper liners. Chill 15 minutes to set a little firmness.
- Prepare the raspberry sauce: In a small saucepan, combine 1 cup raspberries, sugar, and lemon juice. Simmer gently 5–7 minutes, mashing a few berries as you go. Remove from heat and strain through a fine sieve to remove seeds. Let the sauce cool to just warm or room temp.
- Make the chocolate mousse: Melt the chocolate until glossy and smooth, then let it cool slightly. In a separate bowl, whip the heavy cream with vanilla (and powdered sugar) to soft peaks. If using cream cheese, beat it in until smooth. Fold the cooled chocolate into the whipped cream until fully combined and glossy. If the mixture seems tight, fold in a spoonful of extra whipped cream to loosen it a touch.
- Assemble: Dollop a small crust, then a teaspoon of raspberry sauce, and top with a generous layer of chocolate mousse. Repeat once if your cups are deep to create a satisfying three‑layer look; finish with a smooth top.
- Chill until set: Refrigerate 2–3 hours, or up to 24 hours covered, until the mousse holds its shape and the flavors mingle. The tops should look glossy and the edges clean when you wiggle the cup slightly.
- Serve: Garnish with fresh raspberries, chocolate shavings, and a mint leaf. Keep refrigerated until serving for the best texture.
Tips & Variations
- Make it dairy-free: Use dairy-free chocolate, whip coconut cream instead of heavy cream, and replace butter with melted coconut oil.
- Gluten‑free option: Use gluten‑free chocolate cookies or oat‑based biscuits and ensure any added ingredients are labeled gluten‑free.
- Espresso upgrade: Add a pinch of espresso powder to the chocolate for a mocha twist.
- Quick set: If you’re short on time, pop the cups in the freezer for 20–30 minutes to speed up chilling (check them frequently so they don’t freeze solid).
- Make ahead: Assemble the crust and filling up to 1 day in advance and store separately; assemble right before serving for the freshest texture.
- Store and reheat: Keep the cups in the fridge for up to 2–3 days. They’re not meant to be reheated; enjoy them cold for best texture.
- Flavor swaps: Swap raspberries for strawberries, cherries, or a mixed berry blend. The mousse pairs beautifully with berry coulis of any fruit.
- Keep the sauce silky: If your sauce thickens too much, whisk in a teaspoon of lemon juice or a splash of berry juice to loosen it before layering.
Serving Suggestions
Display these little beauties in clear glass cups to show off the layers—perfect for a Pinterest-worthy spread. Pair with a light arugula salad with citrus vinaigrette or a simple almond‑crisp side to balance the sweetness. For a date night setup, place cups on a mirrored tray with a few fresh raspberries and a dusting of cocoa powder; the shine from the chocolate and the pop of red are irresistible in photos.
Make‑it‑a‑meal ideas: serve alongside a citrusy quinoa or chickpea salad with herbs, so you still keep things bright and fresh. If you’re entertaining, add a small bowl of extra raspberries on the side for dipping and extra pop of color.
FAQs
Can I thicken this dessert without eggs?
Yes. The mousse relies on whipped cream (and optional cream cheese) to hold its texture. For extra firmness, you can whisk in a little softened cream cheese or use a small amount of gelatin dissolved in warm water and folded into the mousse after it has cooled a bit. Let it set in the fridge for a couple of hours.
Can I make this ahead?
Absolutely. You can prepare the crust and raspberry sauce up to a day ahead, and whip the mousse the day you plan to serve. Assemble just before serving for the cleanest layers, or assemble and chill up to 24 hours in the fridge for convenience.
What if I want to reheat or re‑warm the dessert?
Don’t reheat; these cups are best cold. If you need to soften the mousse a touch for plating, a 5–10 second nudge of warmth can help loosen it, but keep it brief to avoid melting the layers.
Can I use a gluten‑free or vegan version?
Yes. For gluten‑free, use GF cookie crumbs and ensure any chocolate or dairy products are certified GF. For vegan, use dairy‑free chocolate, whip coconut cream, and skip the cream cheese or substitute with a vegan cream cheese if you’d like extra stability. The crust can also be replaced with crushed almonds and coconut oil for a nutty, dairy‑free base.
Can I substitute other berries in place of raspberries?
Definitely. Strawberries, cherries, or a mix of berries work beautifully. If you use sweeter berries, you may want to adjust sugar in the sauce accordingly.
How do I keep the raspberry sauce silky and free of seeds?
Simmer the berries with sugar and lemon juice, then strain through a fine mesh sieve to remove seeds. If you want to avoid seeds entirely, whip the sauce briefly after straining to incorporate a touch of air and smooth texture.
Should I add pasta or other sides with this dessert?
This is a dessert meant to stand on its own. It pairs nicely with a light, fresh salad or a fruit plate, but pasta or heavier sides would overwhelm the delicate flavors and textures of the mousse cups.
Final Thoughts
These Marry Me No Bake Raspberry Chocolate Mousse Cups are a friendly, romance‑ready treat that looks as good as it tastes. They glide through a busy week with quiet confidence, and they shine on Pinterest because they’re both pretty and practical. From the crust to the silky chocolate mousse, every bite is a little celebration of simple ingredients and big flavor. Grab a spoon, invite a friend or your favorite person over, and let the cups do the talking.

Irresistible Dreamy NoBake Raspberry Chocolate Mousse Cups
- Total Time: 3 hours 30 minutes
- Yield: 12 mini cups 1x
- Diet: gluten-free
Description
Indulge in NoBake Raspberry Chocolate Mousse Cupscreamy elegant and instantly craveworthy A dreamy dessert that elevates any occasion Tonight
Ingredients
1 1/2 cups chocolate cookie crumbs
3 tablespoons unsalted butter, melted
1 1/2 cups fresh raspberries, divided
2 tablespoons granulated sugar
1 teaspoon freshly squeezed lemon juice
1 cup heavy cream (cold)
4 oz dark chocolate (70% cacao), finely chopped
2 tablespoons powdered sugar
1 teaspoon vanilla extract
2 tablespoons cream cheese (optional, for extra stability)
Fresh raspberries and chocolate shavings for garnish
Instructions
- Make the crust: In a small bowl, mix the chocolate cookie crumbs with the melted butter until evenly moistened. Press a compact layer into the bottoms of 12 mini cups or a muffin tin lined with paper liners. Chill 15 minutes to set a little firmness.
- Prepare the raspberry sauce: In a small saucepan, combine 1 cup raspberries, sugar, and lemon juice. Simmer gently 5–7 minutes, mashing a few berries as you go. Remove from heat and strain through a fine sieve to remove seeds. Let the sauce cool to just warm or room temp.
- Make the chocolate mousse: Melt the chocolate until glossy and smooth, then let it cool slightly. In a separate bowl, whip the heavy cream with vanilla (and powdered sugar) to soft peaks. If using cream cheese, beat it in until smooth. Fold the cooled chocolate into the whipped cream until fully combined and glossy. If the mixture seems tight, fold in a spoonful of extra whipped cream to loosen it a touch.
- Assemble: Dollop a small crust, then a teaspoon of raspberry sauce, and top with a generous layer of chocolate mousse. Repeat once if your cups are deep to create a satisfying three-layer look; finish with a smooth top.
- Chill until set: Refrigerate 2–3 hours, or up to 24 hours covered, until the mousse holds its shape and the flavors mingle. The tops should look glossy and the edges clean when you wiggle the cup slightly.
- Serve: Garnish with fresh raspberries, chocolate shavings, and a mint leaf. Keep refrigerated until serving for the best texture.
Notes
No-bake dessert featuring a crisp chocolate cookie crust, raspberry sauce, and airy chocolate mousse layered in 12 mini cups; includes dairy-free and gluten-free variation notes.
- Prep Time: 45 minutes
- Cook Time: 0 minutes
- Category: Dessert
- Method: No-bake
- Cuisine: American
Nutrition
- Serving Size: 12 mini cups
- Calories: 320 calories
- Sugar: 20 g
- Fat: 24 g
- Carbohydrates: 28 g
- Fiber: 2 g
- Protein: 4 g